Settings
The DaCoPAn animator can be tuned to adapt it to the different user purposes. The setting panels are the interface for the user to set the animator parameters.
Accessing the setting panels
There are two ways to access to the setting panels:
From the main toolbar clicking on the icon for the settings
![]()
From the menu: File->Settings
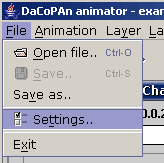
Types of settings
There are some different types of settings depending on their functionality.
They have been divided into three basic categories
Scale Settings
Setting up the animation display size and the speed of it are the most basic features of the animator and the user will need to tune them often to get the visualization. The scale settings panel contain some elements that will made easier to adjust these values.
- Scale mode: Defines a factor of scale to draw the MSC animation.
- Seconds to seconds: one second of network time is animated in one second.
- Seconds to 0.1s: 0.1 second of network time is animated in one second.
- Seconds to 0.01s: 0.01 second of network time is animated in one second.
- Seconds to milliseconds: a millisecond of network time is animated in one second.
- Visual Scale: Adjusts the number of pixels used in the MSC animation to draw one unit (second, 0.1s, 0.01s, millisecond) of network time.
- Time Scale: Number of seconds that takes to the animation to show one unit (second, 0.1s, 0.01s, millisecond) of network time. Higher values mean that the animation will move slower. The slider work with a logaritmic function to allow more precision for higher values.
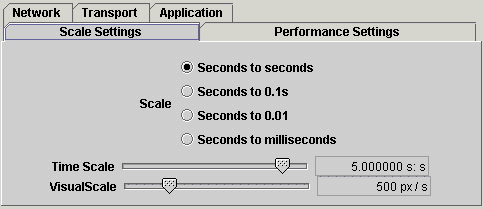
Scale settings
Elements to display in a layer
The MSC animation lets the user to show some information about the network units while the animation is running. There are two types of data that can be shown in the screen: variables (host-dependent values that are changed during the network transactions) and protocol header fields (value extracted from the header of a message exchanged in the network).
Protocol header fields and variables are values specific to a layer, so the animator creates a panel per layer to select the fields and variables to display. These selection are made through two separeted lists that contain the different variables and fields for the different protocols in that layer.
These selections are made by single-clicking on the different items in the list. No group selections are allowed. To deselect an item just single-click it again. Due to screen space issues when drawing the animation the number of variables and header fields that can be swown has been limited. The actual limits for them are 3 variables and 5 protocol header fields. If this limits are reached a message is displayed, as you can see in the figure.
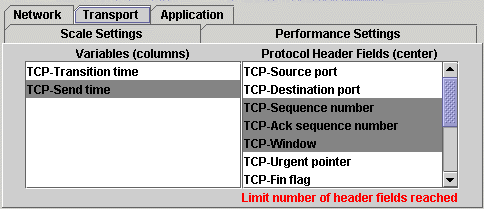
Layer settings panel
The variables and protocol header fields are displayed in different places in the MSC animation. The variables are shown in the columns every time that a message unit is sent or received (message unit event). The protocol header fields are displayed over the lines that represent the message unit.
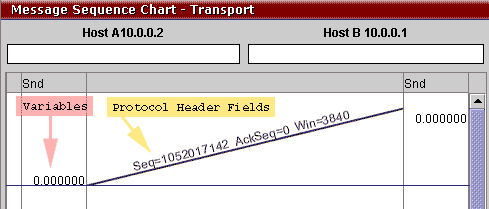
Variables and protocol header fields represented in the MSC
animation
Performance settings
These settings let the user select the load of the animator over the system in wich is running.
- Refresh delay: Sets the number of milliseconds between two refreshes of the animation. Increasing its value means that the screen will be refreshed few times in a second, the perception of the user is that the animations are less smooth in the movement, but the performance of the animation is increased. If the values are decreased the performance is worst but the element in the animation move softer.
- Anti-Alias: Sets the smoothness of the elements drawn in the different screens. If the checkbox is selected the elements in the animations are drawn smoother, but in the other hand the performance of the animator is worse. De-selecting it we get the inverse results, poor graphics but better performance.
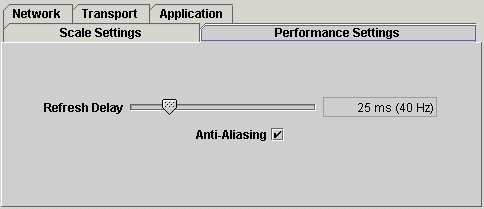
Performance settings
Settings and working modes
The panels displayed to change the settings are different depending on the working mode of the DaCoPAn animator, due to the different purposes of the two modes.
Explore mode
In the explore mode the complete set of settings can be configured, these are settings are:
- Performance: adjusts the performance of the animation
- Scale: adjusts the scale settings for all the layers in the animation.
- Layer: a panel per layer is displayed to adjust the variables and header fields to include in the animation.
Scenario mode
A smaller number of settings can be configured here. Due to the purpose of creating a item for the scenario playlist, only the settings needed for one of those items is displayed:
- Scale: adjust the scale settings only for the active layer in the animator. This way different scales to show the animation can be set for the different elements in the playlist.
- Layer: only header fields and variables for the active layer can be selected. An additional checkbox appears in this panel (see Figure) to set wether the animation will be auto played after the previous item or it will wait for the user to press again the play button.

The autoplay checkbox in the layer settings panel
Another place where the setting panels can be invoked is from the recording mode of the scenario playlist. In the scenario playlists the MSC elements settings can be edited by pressing the edit button. The panels open to edit the element settings are the same as the ones for the scenario mode but the values changed are the ones that the MSC element contain.
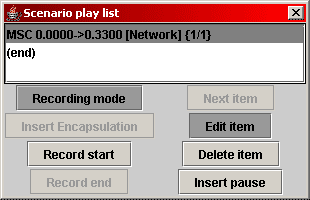
Editing and msc item in the scenario playlist
| < Previous Files | Controlling the animation Next > |
