OUT OF DATE - DON'T USE THIS ANYMORE

OUT OF DATE - DON'T USE THIS ANYMORE

OUT OF DATE - DON'T USE THIS ANYMORE

OUT OF DATE - DON'T USE THIS ANYMORE

OUT OF DATE - DON'T USE THIS ANYMORE

OUT OF DATE - DON'T USE THIS ANYMORE

OUT OF DATE - DON'T USE THIS ANYMORE

OUT OF DATE - DON'T USE THIS ANYMORE

OUT OF DATE - DON'T USE THIS ANYMORE

OUT OF DATE - DON'T USE THIS ANYMORE

OUT OF DATE - DON'T USE THIS ANYMORE

OUT OF DATE - DON'T USE THIS ANYMORE

OUT OF DATE - DON'T USE THIS ANYMORE

OUT OF DATE - DON'T USE THIS ANYMORE

OUT OF DATE - DON'T USE THIS ANYMORE

OUT OF DATE - DON'T USE THIS ANYMORE

OUT OF DATE - DON'T USE THIS ANYMORE

OUT OF DATE - DON'T USE THIS ANYMORE

OUT OF DATE - DON'T USE THIS ANYMORE

OUT OF DATE - DON'T USE THIS ANYMORE

OUT OF DATE - DON'T USE THIS ANYMORE

OUT OF DATE - DON'T USE THIS ANYMORE

OUT OF DATE - DON'T USE THIS ANYMORE

OUT OF DATE - DON'T USE THIS ANYMORE

OUT OF DATE - DON'T USE THIS ANYMORE

OUT OF DATE - DON'T USE THIS ANYMORE

OUT OF DATE - DON'T USE THIS ANYMORE

OUT OF DATE - DON'T USE THIS ANYMORE

OUT OF DATE - DON'T USE THIS ANYMORE

OUT OF DATE - DON'T USE THIS ANYMORE

OUT OF DATE - DON'T USE THIS ANYMORE

OUT OF DATE - DON'T USE THIS ANYMORE

OUT OF DATE - DON'T USE THIS ANYMORE

OUT OF DATE - DON'T USE THIS ANYMORE

OUT OF DATE - DON'T USE THIS ANYMORE

OUT OF DATE - DON'T USE THIS ANYMORE

OUT OF DATE - DON'T USE THIS ANYMORE

OUT OF DATE - DON'T USE THIS ANYMORE

OUT OF DATE - DON'T USE THIS ANYMORE

OUT OF DATE - DON'T USE THIS ANYMORE

OUT OF DATE - DON'T USE THIS ANYMORE

OUT OF DATE - DON'T USE THIS ANYMORE

OUT OF DATE - DON'T USE THIS ANYMORE

OUT OF DATE - DON'T USE THIS ANYMORE

OUT OF DATE - DON'T USE THIS ANYMORE

OUT OF DATE - DON'T USE THIS ANYMORE

OUT OF DATE - DON'T USE THIS ANYMORE

OUT OF DATE - DON'T USE THIS ANYMORE

OUT OF DATE - DON'T USE THIS ANYMORE

OUT OF DATE - DON'T USE THIS ANYMORE

OUT OF DATE - DON'T USE THIS ANYMORE

OUT OF DATE - DON'T USE THIS ANYMORE

OUT OF DATE - DON'T USE THIS ANYMORE

OUT OF DATE - DON'T USE THIS ANYMORE

OUT OF DATE - DON'T USE THIS ANYMORE

OUT OF DATE - DON'T USE THIS ANYMORE

OUT OF DATE - DON'T USE THIS ANYMORE

OUT OF DATE - DON'T USE THIS ANYMORE

OUT OF DATE - DON'T USE THIS ANYMORE

OUT OF DATE - DON'T USE THIS ANYMORE

Installing NetBeans

Computers of the department of computer science

NetBeans is already installed on the computers of department of computer science. On this course we use NetBeans version 7.2 which you can start by typing /opt/netbeans-7.2/bin/netbeans in the terminal. note: the computers also have the older version of netBeans, don't start that one! When starting NB for the first time, the program asks if you should use the settings of the older version, the answer is no. The program will also asks if you want to install JUnit, answer this one with yes. If you're using the department's computers for programming you can directly continue to the part Installing assignment server.

Installing NetBeans on your own computer

You can install NetBeans in two alternative ways:

  1. NetBeans requires JDK (Java Development Kit) to work, here you'll get the installation package that contains everything required. Note: if you use F-Secure antivirus, this installation method is not recommended!
  2. If your computer already has JDK, or if you want to install it yourself first, you'll get it from here. You can get the NB installation package at http://netbeans.org/downloads/index.html. The first option Java SE, suits this course well. Clicking the Download button gets you to the download page.

When you've downloaded NetBeans, install it (by double clicking the program you downloaded, for example).

NetBeans

When you start the NetBeans programming environment, you'll see a view that looks more or less like this:

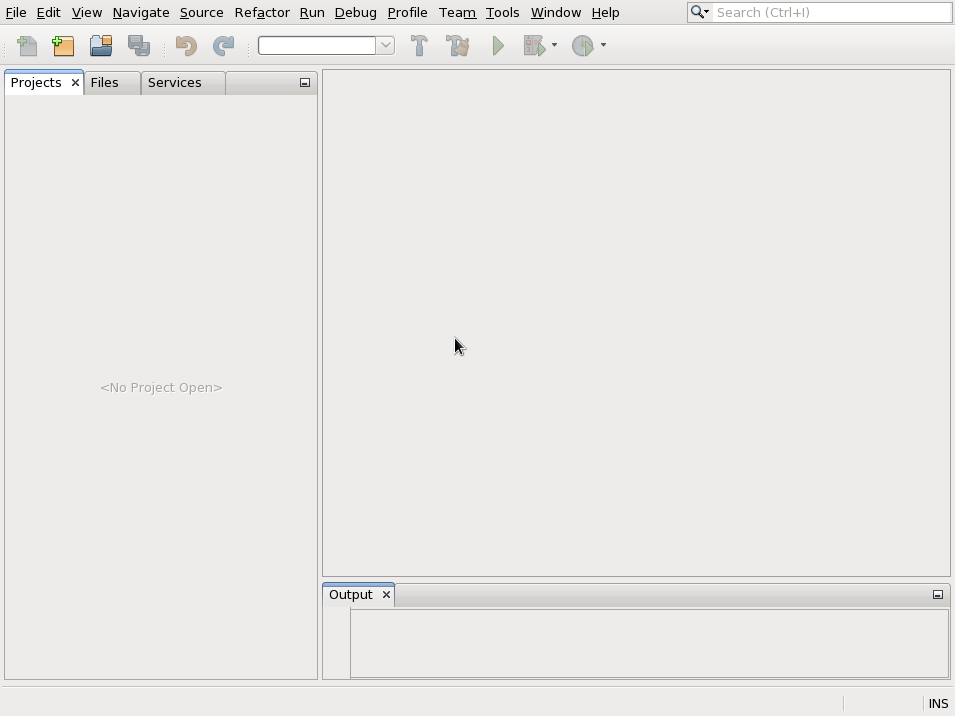
NetBeans consists of multiple areas. On the left is the project menu and the tabs for files (files related to a project that don't show up in the project view, test data, for example) and services (database connections and servers, for example). At the moment, there's no active projects. The area where the cursor of the mouse in the picture is usually shows the active source code files. At the bottom is the output area.

The area in the middle can also have links to different blogs and posts. You can close this area if you want to.

Installing the assignment server

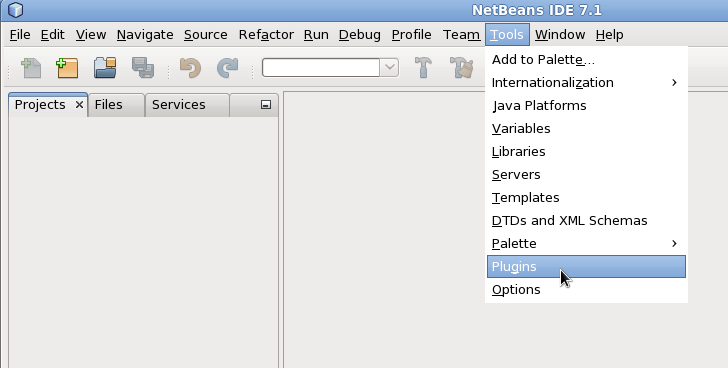
Select 'Tools' from the top bar and then 'Plugins' from there.

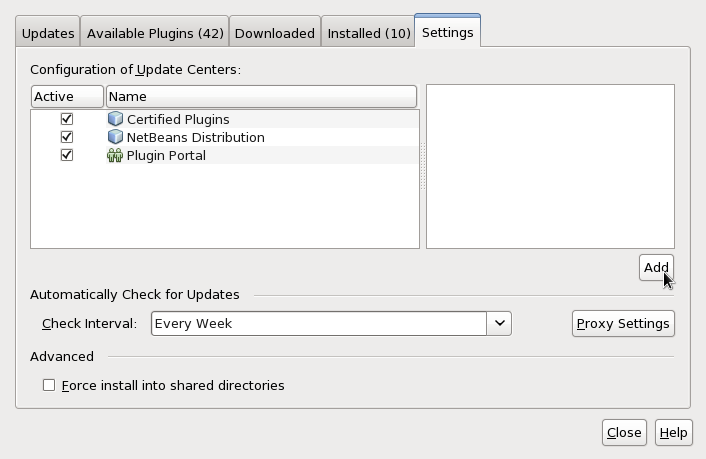
The plugins window will open in front of you. Select the 'Settings' tab and click 'Add'.

You'll get a window to which you have to enter the course information.

Enter "TMC" to the name field, copy-paste this to the URL field: http://tmc.mooc.fi/updates/tmc-netbeans_hy/updates.xml

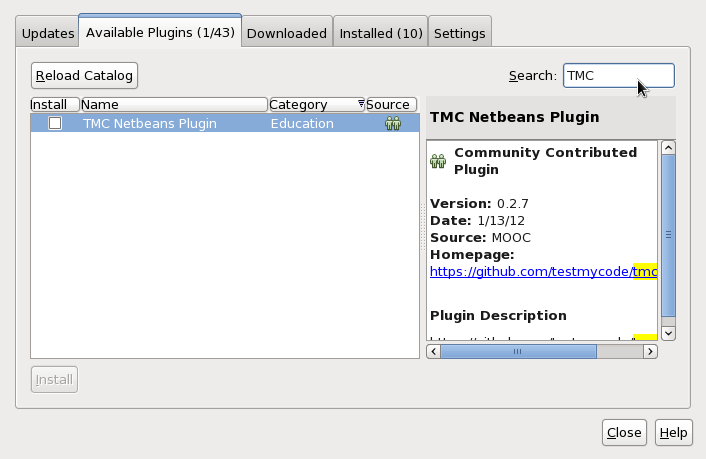
Click OK. You'll get back to the plugins window. Go to the 'Available Plugins' tab and enter "TMC" to the search field.

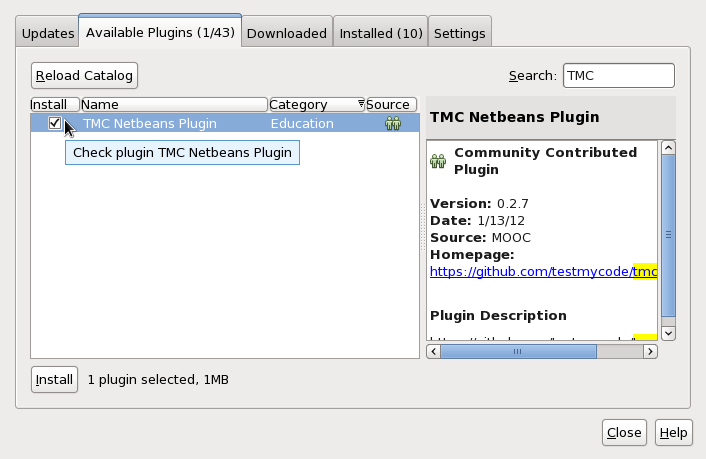
Tick the install box.

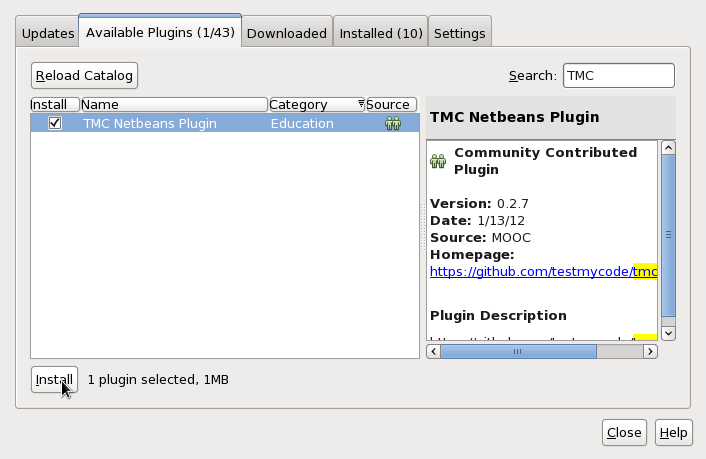
Then click the Install button at the bottom left corner.

NetBeans will begin to install the assignment server when you hit the next button.

First it'll ask you if you accept the license agreement

Accept the terms and click install

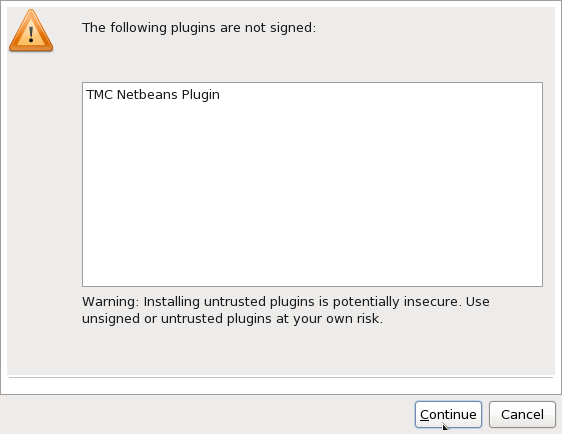
If you get an alert "The following plugins are not signed: ...", choose Continue.

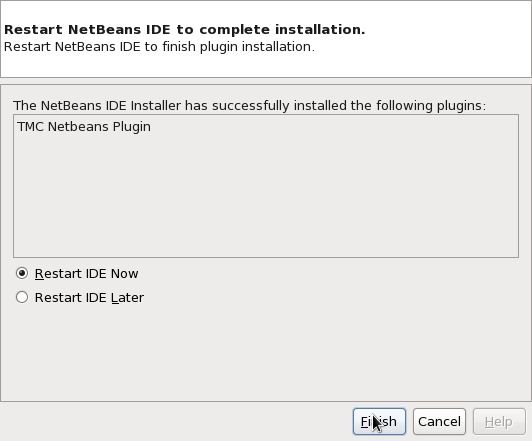
Finally select 'Restart IDE Now' and 'Finish'. NetBeans will restart.

When NetBeans restarts, you'll see a window in front of you which asks for your username and password.

NOTE: if the window doesn't open you can open it from the new tmc-menu at the top bar:

Use the username and password that you got when you signed up. When you've entered your username and password, select XXXIntroductionToProgramming from the Current course drop down menu and click OK.

Congratulations! NetBeans should now automatically download you your first assignments.

Continue now to the material and to the first instructional video.